You have agreed on a project and want to send photos for website creation? We will teach you how to do it in a few steps.
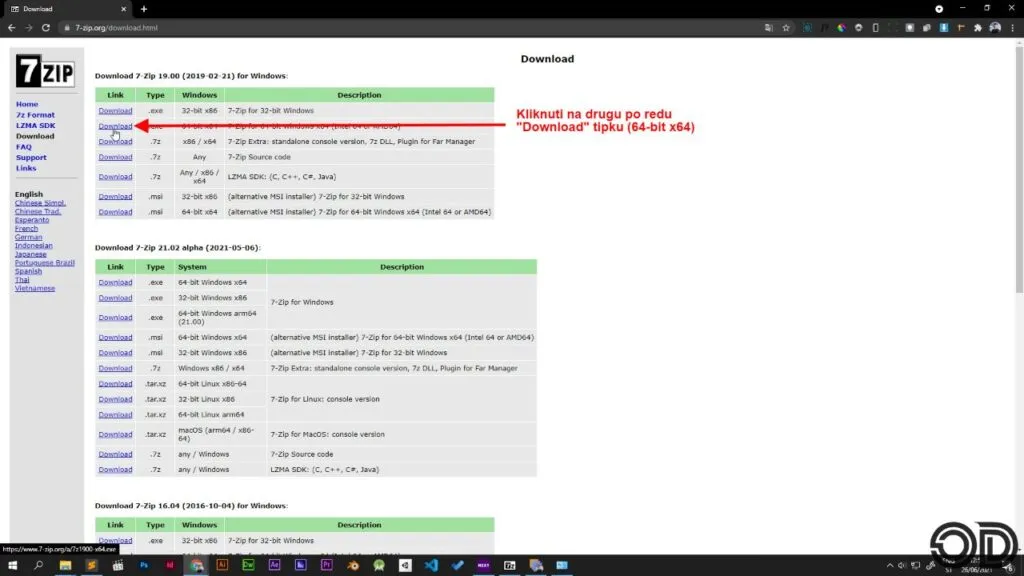
By clicking the download button, download the program 7 -Zip (https://www. 7-zip.org/download.html) to merge all the photos into one file and reduce their overall size. *Note* If you have a newer computer, click on the 2nd download button to download the 64-bit version.
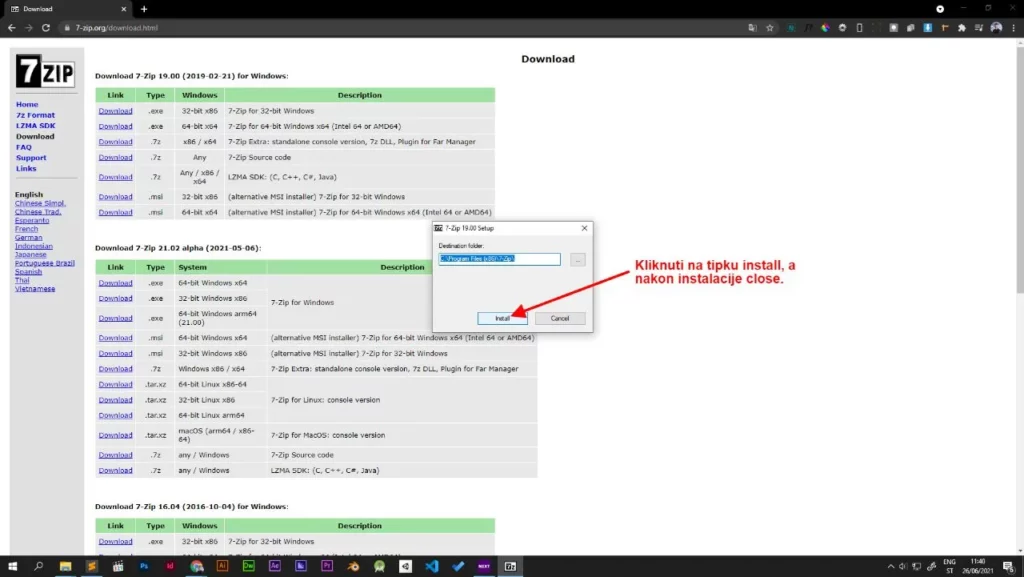
Clicking on the downloaded file will open the installation of 7-Zip</ a> program. Install then close.
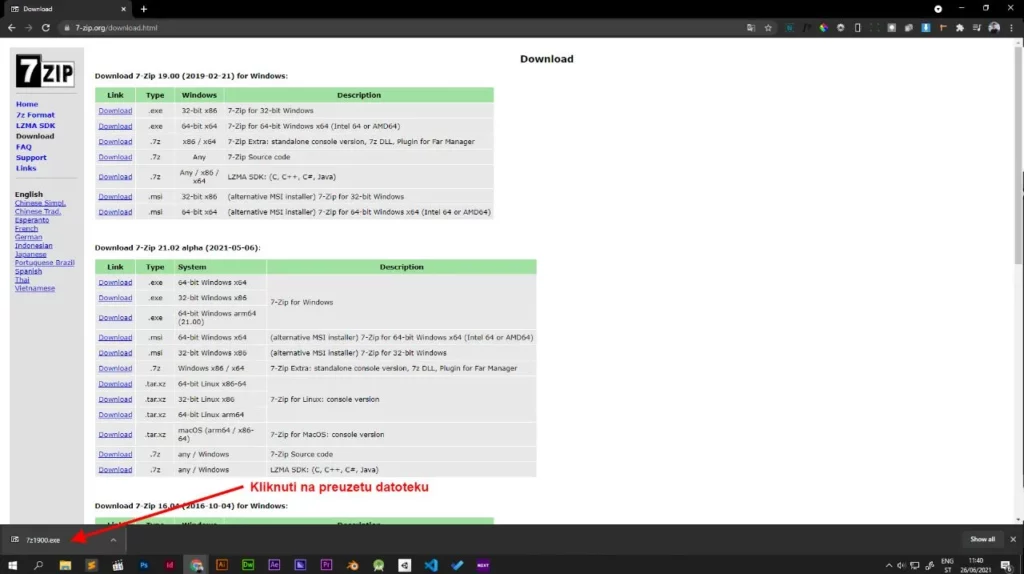
After opening the program installation file, click the Install button to install the program and then the Close button to exit the installation.
Open the photos folder and mark all the photos for the website. Then right-click on one of the photos, select 7-Zip and click on the button Add to archive...
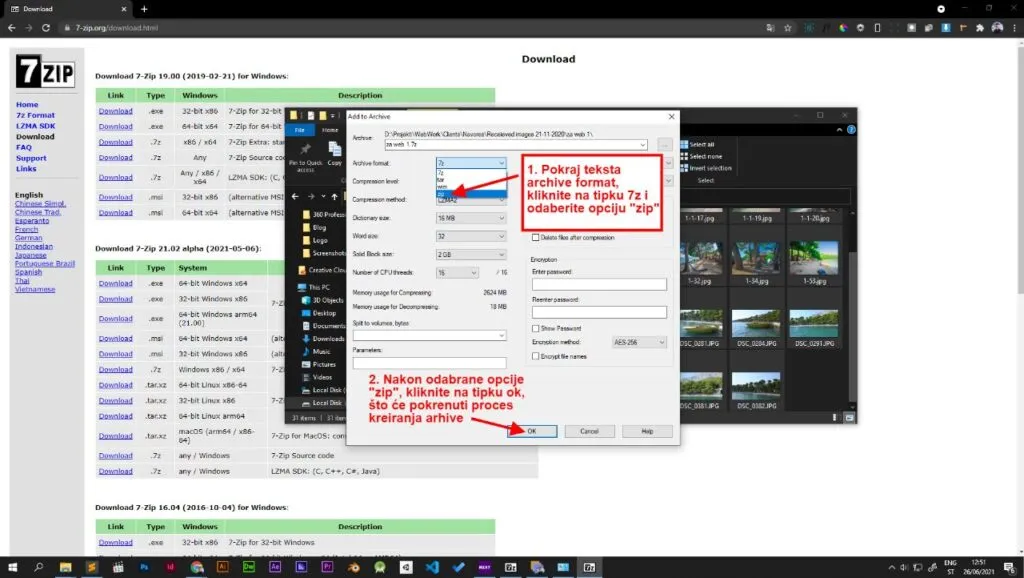
After clicking on the Ok button, the archive creation process will start, and upon completion, a new zip file will be created in the photo folder.

Visit the website WeTransfer (https://wetransfer.com/) and click on the blue Accept button, then the blue I agree button.
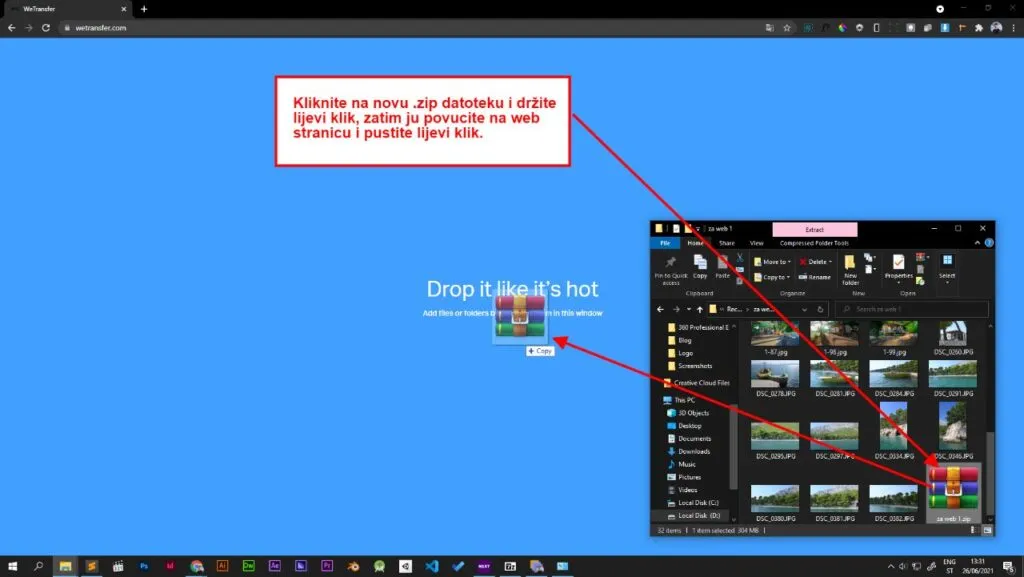
Open the photos folder, find the new .zip file, left-click on it and drag it to the WeTransfer website.
Filling out the submission form. 1. "Email to" field: enter the email address of the company you are sending the photos to 2. field "Your email": enter your email from which you want to send photos 3. "Message" field: Optionally send a message with email 4. After entering the data, click on the transfer button so that a message with a confirmation code will be sent to your email address

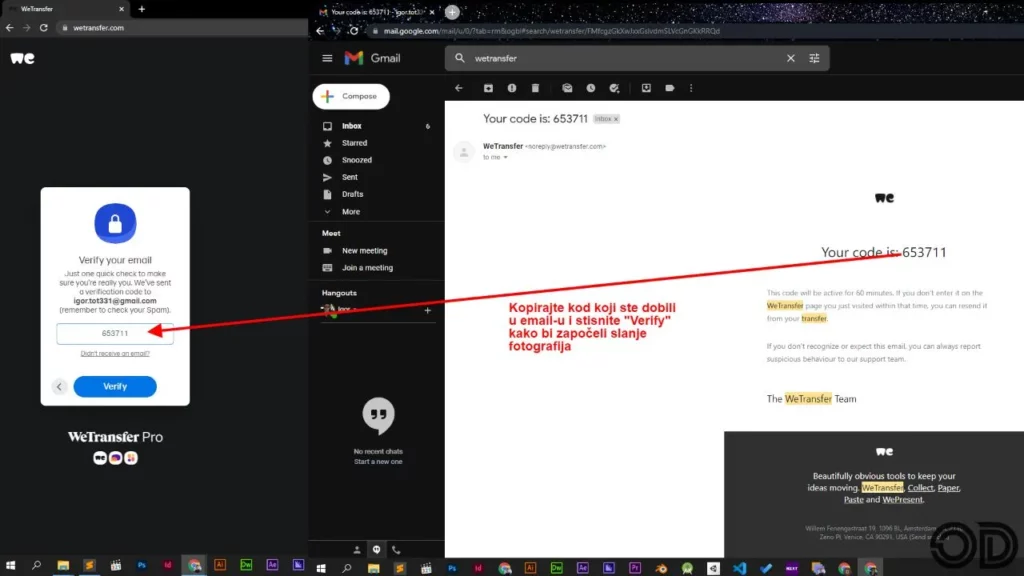
Open the email Your email address that you entered for sending and open the last message from WeTransfer. Copy the verification code, paste it into the form and click Verify. Once the upload is complete, the photos for the website will be sent.
